Getting Started with ACECode
Ⅰ.Introduction to ACECode
ACECode is a graphical programming tool that allows users to program by dragging blocks without having to master complex programming languages.
ACECode covers all the functions of Scratch and adds a robot control module, which allows users to design their own robot works using graphical programming, reducing the difficulty of robot programming and development.
Ⅱ.Download and install ACECode
Step 1: Download the ACECode installation program from the official website.
Log in to the official website of ACECode: https://www.acebott.com/pages/software, enter the software download interface, select the ACECode software version for Windows system, and click Download ACECode to download.

Hint
If you download a compressed package, please decompress it and then proceed to the subsequent installation steps.
Step 2: Double-click the downloaded installer and follow the instructions to install ACECode. Here we take the installation under Windows system as an example for demonstration.
1.After the download is complete, the installation package file will appear as shown in the figure. Click to install the software.

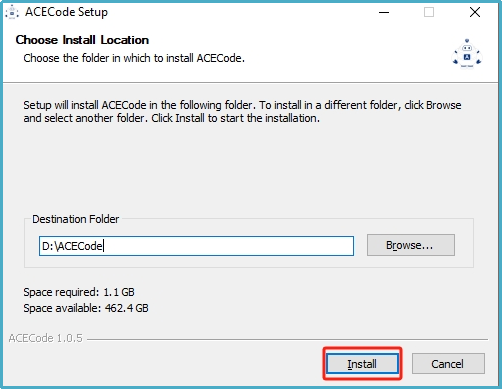
2.After clicking the software, the following interface will appear. Select “Install”. You can choose the default installation path or choose the software installation route yourself.
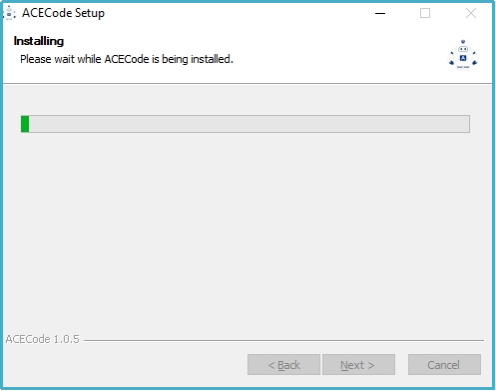
3.ACECode software is being installed.
4.The installation is complete.
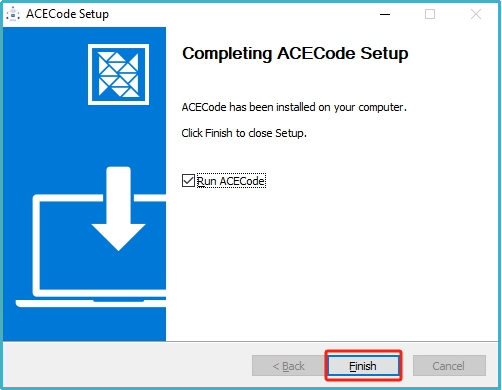
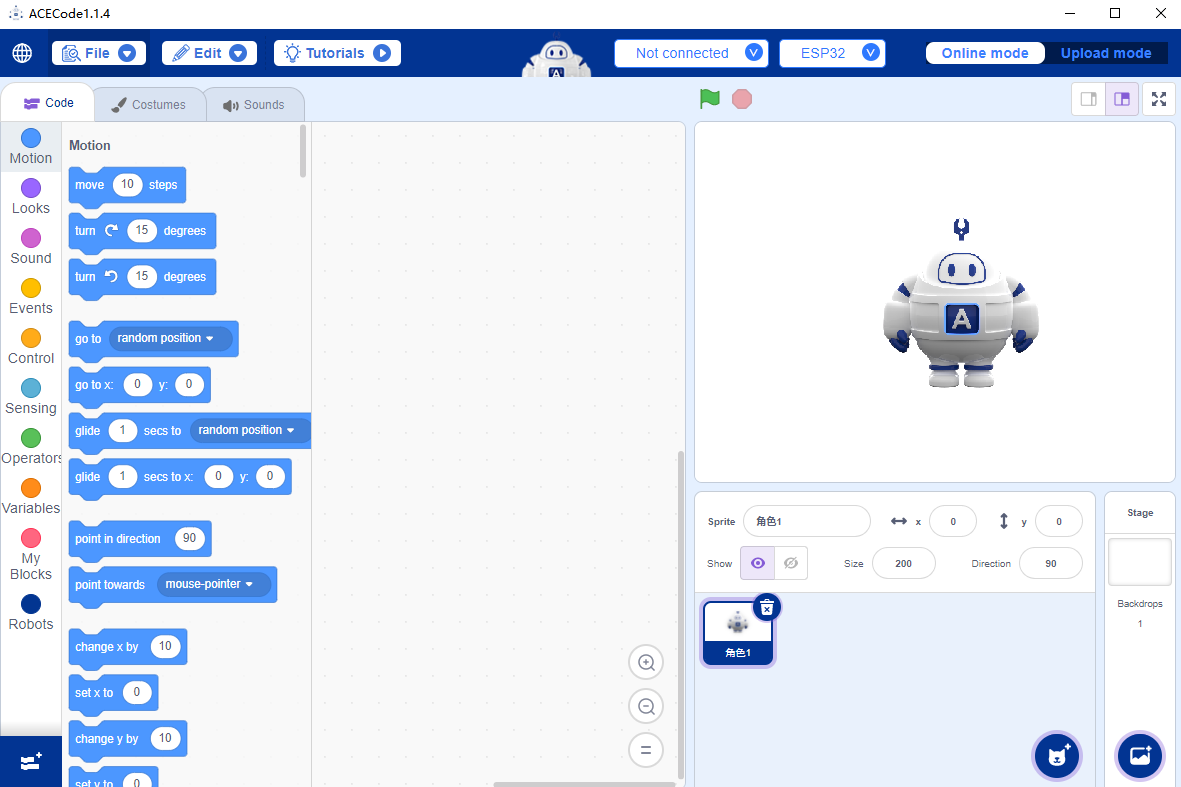
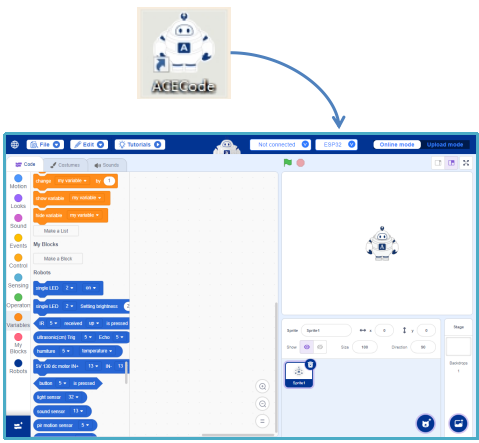
5.Find the shortcut of ACECode on the desktop and double-click to open ACECode.
Ⅲ.Online Mode and Upload Mode
Currently, ACECode supports two development modes: online mode and upload mode. The online mode supports online debugging, which can debug the program in real time, which is convenient and fast; the upload mode is to upload the written program to the ESP32 (or other main controller board) controller board. After the upload is successful, the program can be run on the ESP32 without the computer (the controller board needs to be powered externally).

The following uses the ESP32 controller board as an example to demonstrate how to use ACECode inonline mode and upload mode.
Step 1: Connect ACECode and ESP32 controller board
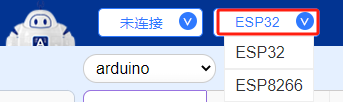
1.In the ACECode main controller board list, select the ESP32 controller board. The software selects ESP32 by default.
2.Find the serial communication connection button in the ACECode interface. The connection status of the serial communication will be displayed on the button. Move the mouse to the serial communication connection button position, and the information list of the serial communication port in the computer will pop up automatically; when no device is detected, it will prompt “No device were found”.

3.When we connect ESP32 to the computer with a data cable, a new port “COM18” will be added to the serial communication port information list. The port number is random and will change according to the actual situation. Click the newly added port to establish a communication connection between ACECode and ESP32. After the connection is successful, the connection status display on the connection button will switch from “unconnected” to the information of the connected port.

Hint
USB power supply may be insufficient, external power supply is required, please connect ESP32 with sufficient power supply and turn on the power switch.
Step 2: Online Mode
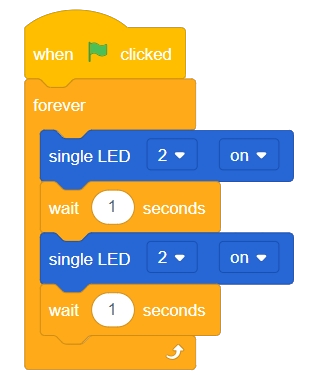
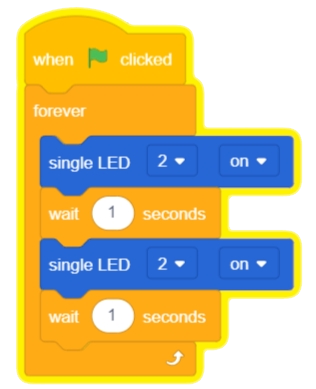
1.Write the following code in online mode to make the built-in LED light on ESP32 flash.
Hint
1.The LED light is integrated on the ESP32 controller board and connected to I/O port
2.The effect of this instruction can make the LED light flash for 1 second on and 1 second off.
2.After writing, debug the code online. Click the code to run it. The code will turn yellow, indicating that the code is running. The LED on the ESP32 will repeatedly light up for 1 second and then go off for 1 second.
Step 3: Upload Mode
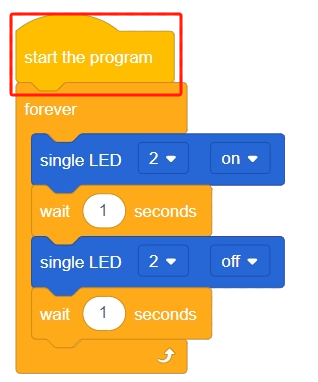
1.After debugging is completed, switch to “upload mode” and change the program startup command to “start the program”. In “upload mode”, you need to use this command to start the program.
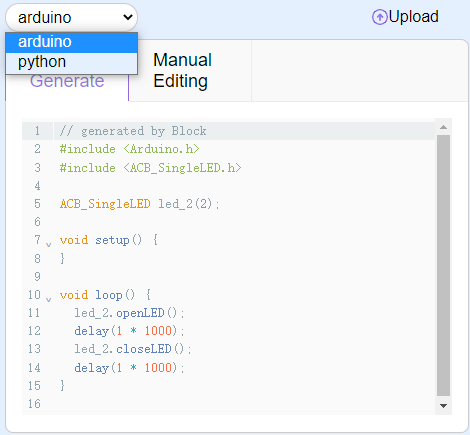
2.At this point, you can see that in ACECode’s “Upload Mode”, the corresponding C language code and Python code will be generated synchronously to meet the different needs of users.
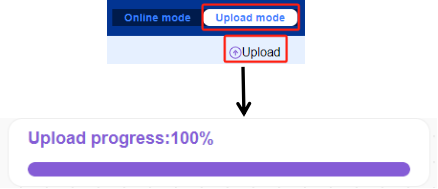
3.Click the “Upload” button to upload the program. When the upload progress reaches 100%, it is successful. After the upload is successful, the program can be run on the ESP32 controller board without the computer, that is, you can unplug the data cable and let the program run independently on the ESP32 (connect the ESP32 to an external power supply).
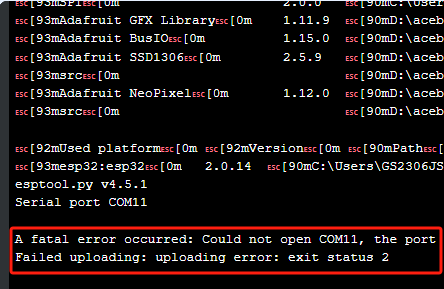
4.If the upload fails, you can debug according to the error prompt in the lower right corner of the console. If prompted here, you can check whether ACECode and ESP32 are connected.